9.05.2014

English Paper Piecing - Hexies

Looking at my scrap basket I realized it was time to do something with those small pieces of fabric that I hate to toss. I have been making a lot of hexies. There are several different techniques for making them. They can be basted in the front or the back.  I like my basting to show on the backside of the hexie. This is the technique to I prefer to use.


These are the supplies I use for making them.
Fabric scraps
Needle and thread
Washable School Glue Stick
Needle Threader optional
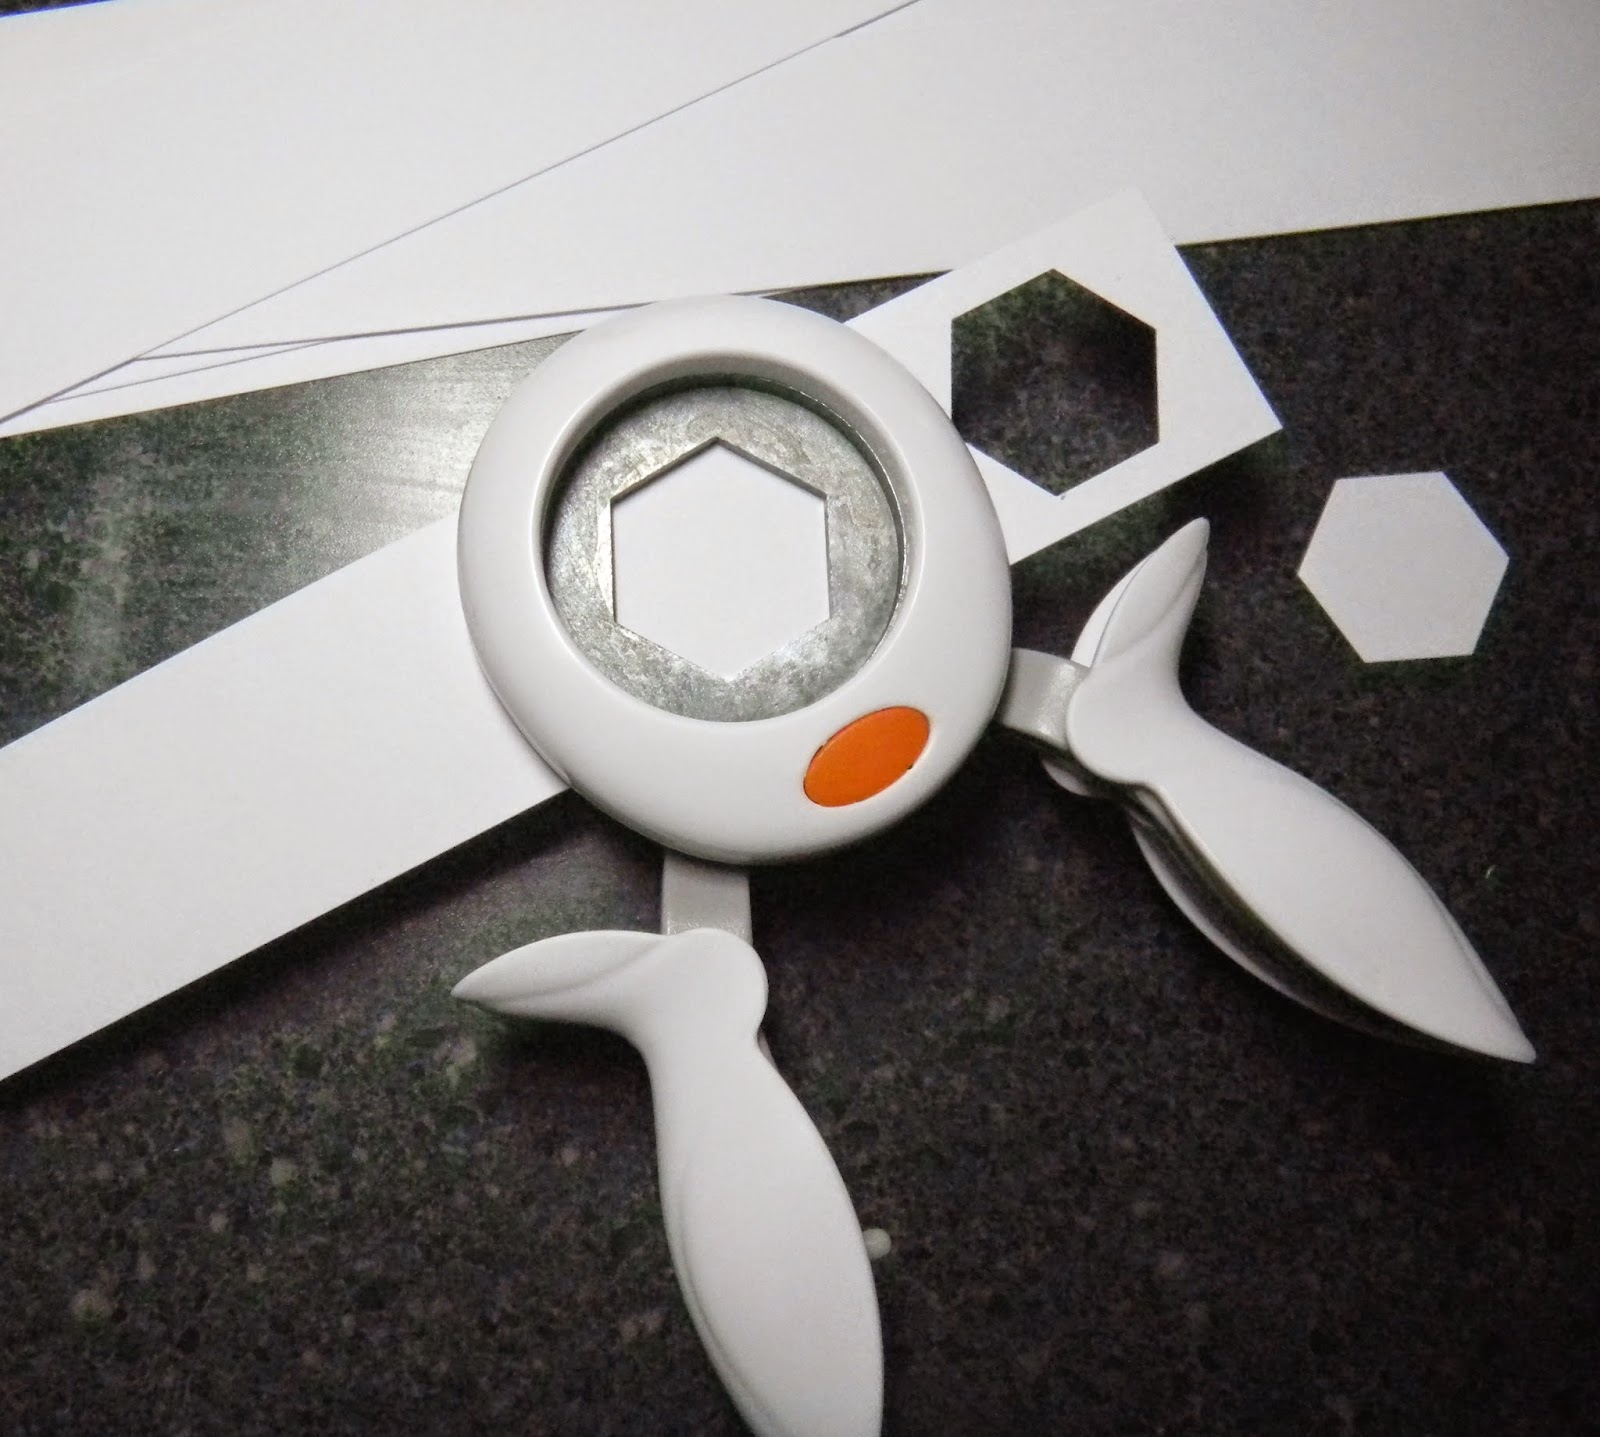
Fiskars Medium Hexagon Squeeze Punch
Card Stock

There hexagon templates available online in different sizes.  I wanted to be able to use my small scraps and decided on 1" hexies.  I found this Fiskars Hexagon Punch that makes 1" hexagons on Amazon for around $9.00 With the punch I know they are exactly the same size each time unlike me having to cut a paper template. I cut my 8 1/2 x 11 piece of card stock into 1 1/4" strips and punched away.  You can make anywhere from 60-70 hexagon templates on a sheet of card stock.

1. Take a paper hexie and swipe it with your glue stick and place it on your fabric scrap. I really like using the disappearing purple glue stick so I can actually see where I swipe it and that way I don't over do my glue.

2. Cut the fabric leaving anywhere from 1/8" to 1/4" of fabric around your paper hexie.  I prefer to cut 1/4", it is easier for me to fold and sew.

3. Thread your needle and knot the end.  I use an applique needle because it is a little more flexible when sewing small stuff. Fold over 1 edge and fold over the next edge to make a mitered corner.
Stitch through the first fold into the second.

4. Bring you needle back to the first fold and through the second fold again.  You should have a nice small stitch holding the corner together.

5. Fold the next piece of fabric to make a mitered corner and repeat making the small stitch.

6. Continue folding and stitching around the hexie.  When you are at the end just pull your needle through the middle and cut your thread.

7. Backside of a finished hexie

8. Front of a finished hexie.


I always cut out a stack of hexies at a time and then I have them ready to sew.

When I am finished I store them in a box until I have a project I want to use them in.
 I will have a future post showing them stitched together. Basically you whip stitch them together and remove the paper when done stitching. 

9.02.2014

Pink Pincushions


I have a added a couple of round pink pincushions to my Etsy shop.
The pincushion measures around 4"wide and 1" tall and is filled with natural crushed walnut shells.  Each has a mini spool pin to match.

6.08.2014

Plant Container Makeover


When looking over my plant containers this spring I had these black containers that really were in need of something.  It was time to give them new life and I decided to try spray painting them with a Rust-Oleum Multicolor texture paint thats is made for outdoors.  

This was my first time using this type of paint and I am happy with the results.  I really like the multicolors and it has soft texture to give it a much better look than a flat spray paint would have.

There are some hungry rabbits around here that are always eating the flowers.  Since these will be on the patio at perfect height for them, I chose these flowers in hope that they will leave them alone.

Bullseye Salmon Geranium
Purple Fountain Grass
Purple Lobelia

Oh... the rabbits did nibble on the lobelia a bit at first but now have pretty much stayed away from the flowers.  Now all it needs to do is grow some more and fill in. 


5.12.2014

Book: Craft it Now


A new craft book called "Craft it Now" came out this month and I am thrilled to have my hand needle pincushion featured in it. There is a variety of over 75 different projects  in this book.  They are simple projects so you can get instant gratification! I can't wait to try a few out myself. If you get a chance check it out.    

Hand Needle Pincushion

4.06.2014

Cherries Head Wrap

I recently bought this cherry fabric with nothing special in mind,  I just thought it would be a fun fabric to have in my stash.  I decided to try a head wrap with summer coming I like to wear my hair up when it is hot. Which I am hoping for some warm weather soon.
You will need around 1/4 yard of fabric.  I folded it in half and cut 2 strips 4" by 37".
The template for the points at the ends I used a piece of card stock 4"x5" and folded in half the long way.  Then I drew a gradual curved line from the middle down to the bottom right side and cut out.

With the fabric still folded in half the long way, I put my template at the ends and traced on the outside edge.  Do this to both pieces and cut out.  Take both pieces and match right sides together and pin.  Using a 1/4" seam allowance start sewing somewhere in the middle and stitch pieces together leaving a 2" opening for turning.
With my pinking shears I trimmed along the the point so I don't have a lot of bulk at the point when I turn right side out.  Turn your wrap right side out and press, pay attention to the opening you left and make sure it gets turned in.  Topstitch around the whole wrap and it is ready to wear. I had some vintage lamp work cherries so I made some earrings to match.